Showing posts with label how to. Show all posts

Thursday, December 18, 2014

Build A Line Challenge


I am getting ready to participate in the BUILD A LINE Challenge from B'sue Boutiques. Click on the badge on the right to read more about it and follow our progress.

"This is how many of us work.....madly, quickly, ideas flowing faster than our fingers can move.  
And I'll be the first to admit:   this is MY workspace down in the Messy Workshop, where our first videos were made, and a space we'll be using again before too long.
We may work in chaos, but chaos will not work for us where our finished jewelry is concerned.  It is time to concentrate, think deep, and discover simple truths about what is IS people want, and how we as handmade jewelry artists can give it to them at prices they will pay. 
That's a real challenge.....and WHY the BUILD A LINE CHALLENGE was born!
Here is my first post on it, you may want to review it:
The Ultimate Challenge
This amazing opportunity will be a challenge that will last three months.  Those who participate will need to be fully committed."

This amazing 3 month course is FREE!!! 1st come, 1st served. I believe the maximum participation is 60, so join up quick!

I'll be revealing my design theme in early January. Make sure to sign up to Follow by Email to get the latest posts.

~ Elizabeth


Thursday, February 13, 2014

Do You Spring Clean?

Construction Zone Wall Decal
Construction Zone Wall Decal by WilsonGraphics
Yesterday and today I've been working on Spring cleaning in my Etsy shop, MadScientistsDesigns. Whew! It's a lot of work, but totally worth it! I'm pretty happy with the results so far.

 Yesterday I went through all of my listings and re-cropped the thumbnail photos to highlight a close-up of each item being careful to make similar items a similar size in the preview thumbnail photo.

Today was the biggie: re-vamping the listing descriptions. Ugh! If you've ever done this, you know that over time you can lose the symmetry/consistency in your descriptions and (horrors!!) even leave out vital information! Yikes!
 
Before:

One hand-formed dragonfly ring in brass with a special dark pink wings. Adjustable and comfortable. The dragonfly's wings and tail hug your finger.. The perfect accent for your Steampunk, Goth, or Vampire fashion!

Jewelry comes wrapped and ready for gifting. See the last picture for examples of packaging.

More dragonflies: https://www.etsy.com/shop/MadScientistsDesigns/search?search_query=dragonfly&order=date_desc&view_type=gallery&ref=shop_search  

Payments accepted: PayPal (preferred), Direct Checkout, Etsy Gift Cards

Shipping: USPS

Thank you for stopping by. Come back soon. :-)

...and After:

One hand-formed dragonfly ring in brass with a special dark pink wings. Adjustable and comfortable. The dragonfly's wings and tail hug your finger like a little friend.

The perfect accent for your Steampunk, Goth, Nature Inspired, or Victorian fashion!

More Dragonflies: http://etsy.me/1iSa86Q

Payments Accepted: Pay Pal (preferred), Direct Checkout, Etsy Gift Card

Ships USPS 1st Class

Jewelry comes wrapped and ready for gifting. See the last picture for examples of packaging.

*********************************
"Dragonfly Meaning

The dragonfly is generally associated with the symbolic meaning of transformation. Here are common meanings for this animal totem:

*Change and transformation
*Adaptability
*Joy, lightness of being
*Symbol of the realm of emotions, invitation to dive deeper into your feeling
*Being on the lookout for illusions and deceits, whether are external or personal
*Connection with nature’s spirits, fairies realms"

From: http://www.spiritanimal.info/dragonfly-spirit-animal/
*********************************

Thanks for stopping by and come back soon! :)


See the difference?
 
What are YOU doing to spruce-up your shop? Which description do you like better? Leave me a comment and let me know. Thanks!
 
xoxo  ~Mad/Elizabeth


Friday, April 27, 2012

Welcome to Viking Knit

What am I working on today - Viking knit!

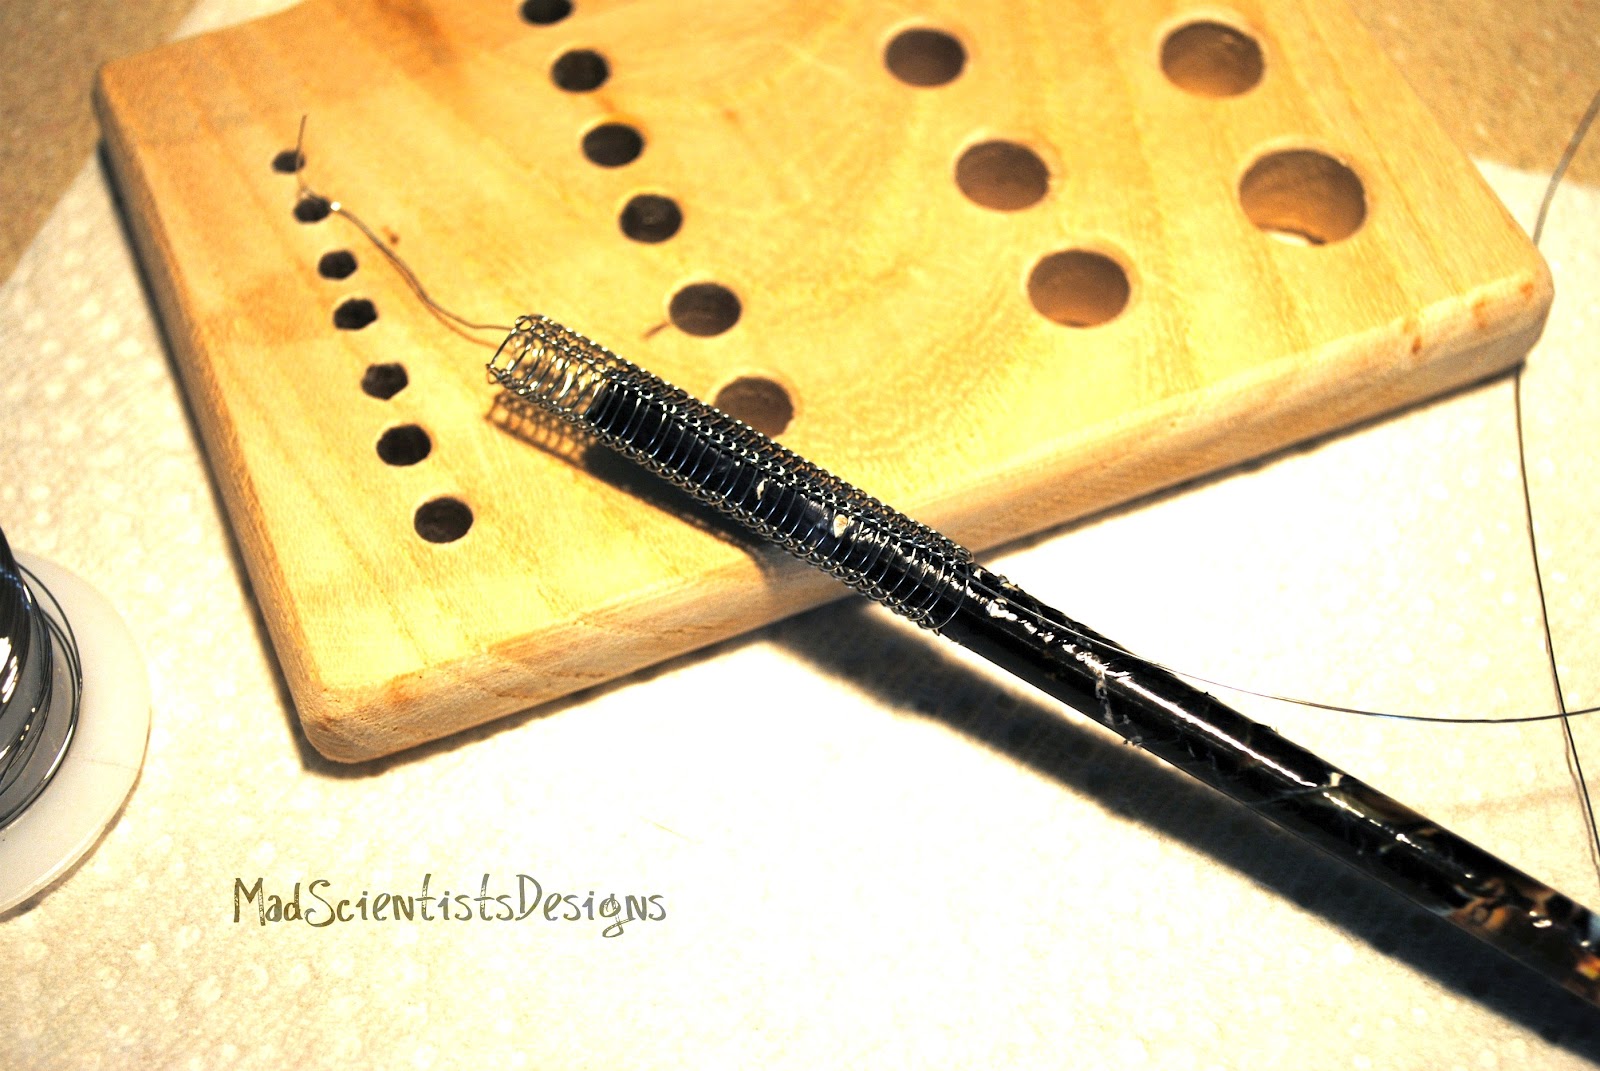
Viking knit is one of my favorite ways to work with wire. Instead of buying expensive tools and tutorials, I learned how to do it by watching YouTube tutorials and I use the "budget" tools, i.e. a pencil...


I did invest in a wooden draw plate though. When you 1st have the raw chain, it is stiff  and does not bend easily. Once you've drawn it through the draw plate it becomes pliable.


Through trial and error I worked out how long I needed of the raw chain to get a certain length of finished chain. Once you reach the length you need, you begin pulling the chain through successively smaller holes in the draw plate (twice per hole) until you reach the outer dimension that you want


Approximately 2 1/4 to 2 1/2 inches of wire wrapped around a standard sized round pencil lengthened to this earring.
 
Check out my favorite YouTube tutorial by BlueKittyCreations.
 
 xo ~ Mad